After the module installation you can start the SharePoint Administration tool by selecting Sitecore » All Applications » Sharepoint.
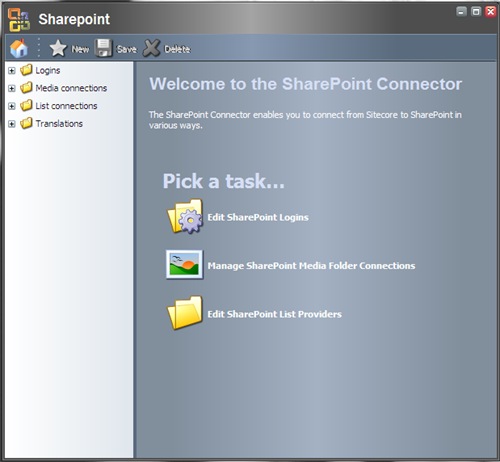
The SharePoint administrative tool will appear.
1. Managing Logins
You need to create at least one login connection to work the with SharePoint Portal server from the Sitecore Client. Click “Edit SharePoint Logins” in the Pick a task section on the right pane.
The Logins folder will be selected. Click the Add New Login button and provide the name for a new SharePoint login. When a new login is created, the following settings should be specified:
-
Description
: the description of the login;
-
URL
: the SharePoint portal site location;
-
User
: the User account to access the portal data;
-
Password
: the password of the mentioned account;
- Domain : if the account is a member of a certain domain, provide the name of this domain here.
The following image displays the sample login setup:
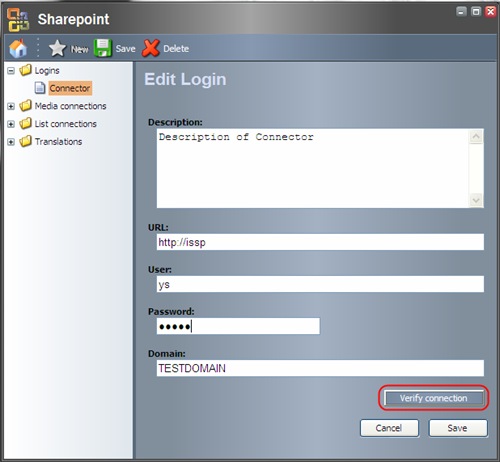
The module provides an option to test the entered settings. After creating a login and specifying the settings, press the Verify connection button. If the settings are invalid, you will be alerted. Save the settings by pressing the Save button after you enter and verify them.
2. List Connections
The SharePoint Connector module populates the Sitecore solution with the content from the SharePoint portal site. In order to add SharePoint Items to the Sitecore content, you should do the following:
-
Create a list connection.
- Create the necessary number of field mappings and optionally provide the way to translate SharePoint Items into Sitecore Items.
You can find a detailed description of these steps below.
2.1. Creating a List Connection
Select the List connections Item in the content tree, press the New button in the main menu and provide the name for a new list connection.
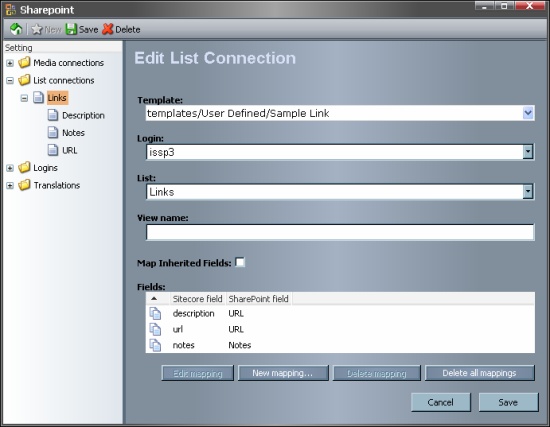
You need to specify the following settings for the newly created list connection:
-
Template : choose the Sitecore template from the dropdown menu. This template should have the list of the fields you want to map from the SharePoint fields;
-
Login : choose a valid login;
-
List : choose one of the SharePoint lists to take the Items from;
-
View name: enter the view name Sharepoint will use when displaying lists. Sharepoint views allow filtering the data in the list.
- Map Inherited Fields : select this checkbox to have an option to map not only the fields of the selected template, but also the fields of its base template;
Press the Save button.
2.2. Mapping the Fields Between Sitecore and SharePoint
After you press the Save button, the New mapping… button will be activated. Press this button to add a field mapping. You’ll see a dialog, where you should choose the Sitecore field, the SharePoint field to match and optionally the translation (the way a field value will be formatted during the mapping).
Known issue : after creating the list connection and creating the first field mapping, you may receive the dialog without Sitecore fields. In this case, close the dialog by clicking the Cancel button and then press the New mapping… button again.
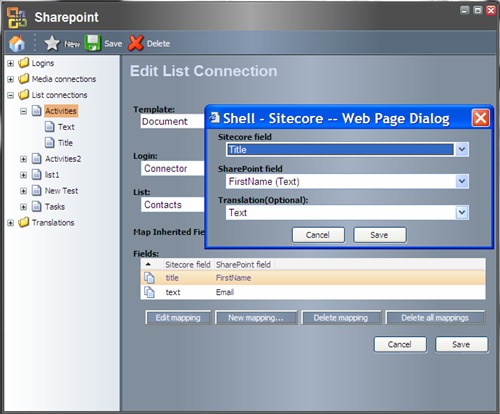
Repeat the procedure of field mapping until you get all the necessary content mapped. At this point, the field mappings may also be edited and deleted.
2.3. Types and Translations
When creating a new mapping or editing an existing field mapping, you can optionally choose the translation. This option allows to manipulate the representation of the mapped fields. If you do not choose any translation from the Translation list, the fields will be mapped as they are. Please refer to the Adding Translations section for more information and a translation example.
3. Managing Media Connections
Media connections make it possible to populate the Sitecore Media Library with SharePoint images and documents.
3.1. Creating a Media Connection
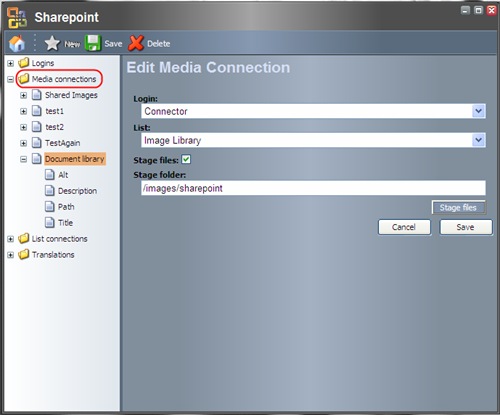
In order to create a media connection, select the Media connections Item in the content tree, press the New button in the main menu and provide the name for a new media connection.
Specify the following settings:
-
Login
: choose one of the valid logins created earlier;
- List: choose one of the SharePoint lists;
- Stage files: select this checkbox to stage files to your Sitecore solution;
- Stage folder: provide a folder to stage the files.
Staging
Note: the Stage files checkbox must be set in order to allow staging.
Press the Stage files button to stage the files of the current media connection. The folder path in the Stage folder field should be a relative path to the existing folder in the Sitecore solution root folder. You will be notified after the files are transferred successfully.
3.2. Scheduling Content Staging
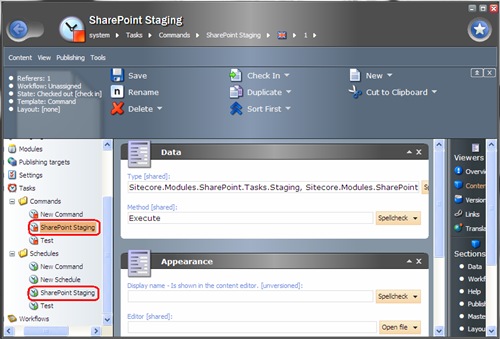
You can make the media content staging automatic. This is done by creating a schedule task. The SharePoint connector module installs the default command and the schedule task.
4. Transfering Content from SharePoint to the Master Database
The procedure of transferring of the Sharepoint content to the master database is based on the virtual items functionality. For more information on virtual and proxy items refer to Using Proxy Items article.
To add a proxy to Sharepoint connection you should do the following:
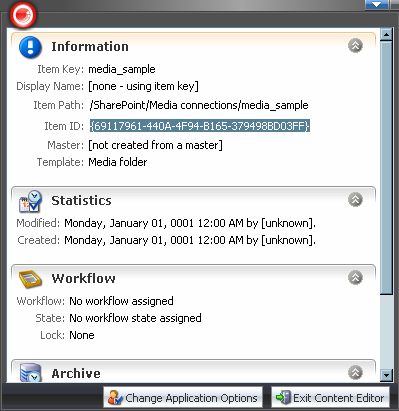
- Switch to the sharepoint database, navigate to a media connection or a list connection item, and click on the red Sitecore logo to display and copy the item ID.
- Switch back to the master database, navigate to /sitecore/system/proxies item and create a new sub-item based on the Proxy template. Switch to 'Raw values' mode and paste the copied ID into Source field of this item. Enter 'sharepoint' into the Source Database field. Switch 'Raw values' mode off and select the target item where the proxy should be placed.
Note: the content under the List connections is supposed to be shadowed into the ‘content’ area of Sitecore, whereas Media connections are to be shadowed into the media library area of Sitecore.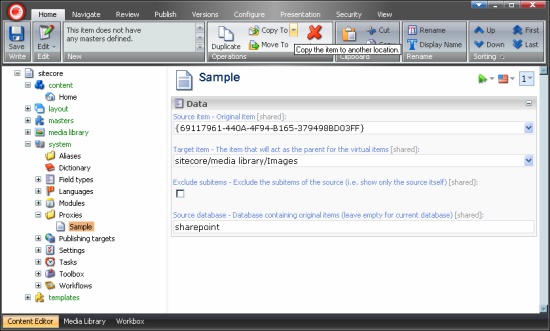
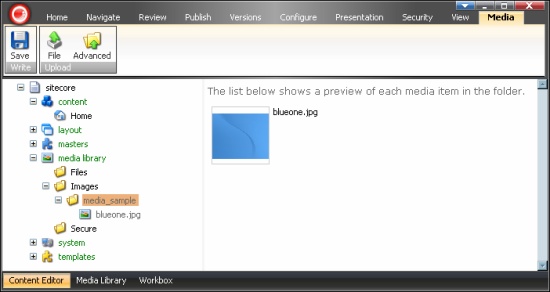
- The proxy will appear under the selected target item:
5. Media Library Support
Sharepoint connector supports the following features of Sitecore 5.3.1 media library:
-
Upload operations on a media connection folder allows uploading of the content to Sharepoint document and image libraries.
-
Files and images are displayed as values of the Blob field of media items. It is possible to download files directly from the Sitecore content editor. The behavior of the Blob field is controlled by the following settings in Web.Config:
- Sharepoint.MediaProvider.MaxBlobSize defines the maximum size of a file that can be displayed as Blob (default: 1MB)
- Sharepoint.MediaConnection.DownloadTimeout defines the timeout of media requests to Sharepoint server.